A bathroom is a unique space that requires meticulous attention to detail during renovation. Constant humidity and temperature fluctuations, along with specific electrical and plumbing requirements, require exceptional care when finishing a bathroom. We consulted with TQN Construct’s construction and maintenance specialists to provide you with the most helpful recommendations.
Types of Renovations
First, you need to decide what exactly you want to do:
- Cosmetic. This is the simplest, most economical, and quickest option, involving updating surfaces — replacing the floor, painting the ceiling and walls, replacing doors, and sometimes even plumbing. This type is done to refresh the look of a room.
- Major. This involves a full cycle of work: leveling surfaces, re-flooring, completing the room’s finish, and installing new utilities.
Sometimes, so-called spontaneous renovations are also considered — due to sudden leaks, accidents, or critical material wear and tear that require urgent replacement.
Where to Start
First, you need to create a detailed plan for the upcoming changes, calculate material consumption, and estimate costs. This planning should be based on the chosen design. When deciding on the interior, consider the room’s dimensions and map out in advance the locations of electrical outlets, the range hood, and appliances.
It’s important to ensure access to pipes and avoid hard-to-reach corners to prevent dirt from accumulating in the bathroom. If you can’t commission a designer, you can use specialized services.
Deciding on a design is easier if the bathroom follows a unified style. The most common bathroom design trends today are:
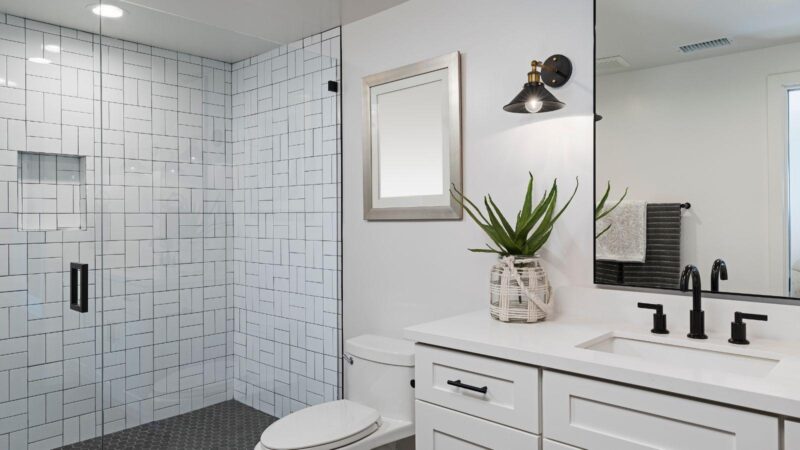
- Minimalism. Decor and embellishments are minimal, with only the essentials. It’s best to avoid a single color, as this will look boring and monotonous. Bright fixtures or furniture can be used as accents. This style is ideal for a small bathroom.
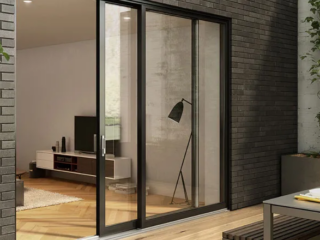
- Modern style would look interesting in a bathroom. Smooth lines and the use of wood, glass, and metal finishes will add a light, airy feel to the interior.
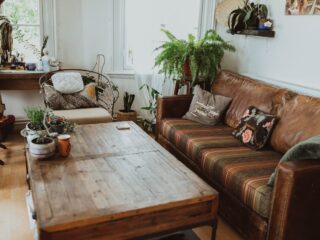
- A loft-style interior features textures reminiscent of raw wood, concrete, and brick. The emphasis is on rough textures, with utility lines often left exposed. The design can be complemented with unusual accessories in a “factory” style.
- Classic. This style allows for large, expensive-looking elements. Natural materials predominate in the interior. The most popular classic colors are peach, sand, gold, and all wood tones.
- Provence style is characterized by antique elements and the extensive use of natural materials. This style emphasizes spaciousness and good lighting. Characteristic features of the style include warm pastel colors, floral motifs, embroidery, plastered walls, and wooden ceiling beams.
Of course, the choice of style depends entirely on your preferences and the overall design of your home.
Do It Yourself or Hire Professionals
The cost of professional repair services depends on the type of renovation. You can do it yourself, but even then, it’s still recommended to entrust some work to professionals.
If you don’t have successful renovation experience, it’s best not to attempt it yourself—at least some of the work should be delegated to professionals. Regardless of who is performing the renovation (an individual or a company), a contract must be signed by the parties outlining the scope of work, timeframe, cost, and responsibilities.
With some experience, you can level walls, lay tiles, and install plumbing fixtures yourself, but replacing utility lines, installing new wiring, and installing electrical outlets is best left to professionals.
Selecting Materials
It’s important to choose furniture and materials that are easy to assemble and install so that if one section is damaged, it can be replaced without having to repair the entire piece. For bathroom renovations, use only moisture-resistant materials, ideally with antiseptic properties. This will prevent mold and mildew growth in high-humidity conditions.
Cost Estimates
When calculating a bathroom renovation budget, all types of work and material consumption are factored in based on the room’s square footage. The estimate includes new appliances, decorative elements, furniture, and delivery, assembly, and construction waste removal.
It’s a good idea to add approximately 25% to the final cost as a safety margin, as some consumables or tools may be damaged, prices may increase, or additional services may be required.
Skimping on renovations is generally not a good idea. If saving money is a priority over ensuring the quality of materials and workmanship, it’s unrealistic to expect durability. However, there’s no need to overpay for finishes and fittings that don’t meet the home’s standard. Under no circumstances should you buy cheap pipes and wires for wiring: purchasing low-quality or even counterfeit products will compromise safety.
Common Mistakes
Clogs and unpleasant odors, mold and increased humidity — these are just some of the problems you might encounter in a bathroom after a poor-quality renovation. However, most problems can be avoided by considering all the details during the finishing stage and avoiding major mistakes.
Incorrect Drainage Slope
To ensure proper drainage from bathtubs and showers, it’s crucial to maintain the correct slope of the drain pipe. According to regulations, it should be 3 cm per linear meter of a drain with a diameter of 40-60 cm.
In other words, the farther the plumbing fixtures are located from the sewer riser, the steeper the slope should be. This will prevent stagnant water and reduce the likelihood of clogs, which in turn will lead to unpleasant odors from the drain holes. If the slope is too steep, the water will drain too quickly. This, surprisingly, can also lead to clogs, as the drain pipe simply won’t have time to wash away all the dirt that gets into it.
No Access to Pipes
Bathrooms contain a large number of pipes, valves, and faucets, which rarely add to the aesthetic appeal of any room. Therefore, some people take a radical approach to this problem by completely sealing off some of the pipes or even embedding them in the wall.
Never do this! Firstly, if a problem occurs without direct access to the pipes, you’ll be the last to know about it, and likely not in a very polite manner, from your downstairs neighbors. Secondly, if you need to replace a component, you’ll have to dismantle the entire paneling, remove tiles, or even knock down a wall. And, as luck would have it, this can happen at the most inopportune moment.
Lack of Adequate Ventilation
Due to high humidity, the bathroom also requires adequate ventilation. Without it, condensation will accumulate on surfaces, and the indoor climate will be unhealthy.
Needless to say, bathroom vents should never be sealed. But that’s not all. It’s advisable to ensure not only air outflow from the room, but also air inflow. To achieve this, leave a small gap under the door or even install a panel with a ventilation grille.
Roofing and Bathroom Renovations: Why Roof Leaks Matter
Many “bathroom problems” actually start above the ceiling. A roof leak, cracked tiles, damaged flashing, blocked gutters, or failing roof penetrations (vents, skylights) can let water track down into the bathroom ceiling and wall cavity—leading to mould, peeling paint, swollen plaster, and hidden timber damage. Before investing in tiles, waterproofing, and new finishes, it’s smart to rule out roof-related moisture issues and fix them early. If your bathroom has recurring stains, damp smells, bubbling paint, or ceiling sagging, a roof inspection and roof leak repair can prevent repeated damage and protect your renovation long-term.
Painting in Wet Areas: The Right System for Bathrooms
Bathroom painting isn’t the same as painting a bedroom—humidity and condensation demand a proper coating system. For the best result, surfaces should be cleaned, mould treated, sanded, and sealed with the correct primer before applying moisture- and mould-resistant bathroom paint (often low-VOC acrylics or specialty wet-area coatings). Ceilings and cornices are common failure points, especially when ventilation is weak, so using the right paint plus good airflow (exhaust fan + makeup air gap under the door) helps prevent peeling, blistering, and mildew regrowth. A professional painter will also focus on the details that make bathrooms look premium: sharp cut-ins, durable enamel on trims/doors, and coatings that stand up to daily steam.
Work Sequence
When working on a bathroom, the correct work sequence is especially important. Follow the following procedure.
1. Purchasing Materials. Once the design has been selected, a sketch has been created, and the scope of the work is understood, consumables and tools are purchased. According to the previously compiled list, materials are purchased with a small reserve.
2. Demolition. Old plumbing fixtures are removed, and trim is dismantled. The bathtub will need to be removed, even if it is not being replaced, so as not to interfere with the renovation.
3. Surface Preparation. After cleaning the room, all surfaces should be inspected to determine the condition of the walls, ceiling, and floor, and whether they need to be completely replaced or whether partial restoration (sealing seams, repairing peeling areas) will suffice. After this work, the ceiling is waterproofed.
4. Installing Pipes and Electrical Wiring. The next step is laying pipes and wiring. This may require chasing. Then the walls are prepared for finishing by plastering and filling.
5. Preparing the Flooring with a Floor Screed. At this stage, it’s important to treat all surfaces and waterproof them.
6. Decorative Finishing. Now you can begin transforming the bathroom. Typically, they begin by laying tiles or other wall coverings.
7. Ceiling and Floor. The next step is installing a suspended ceiling, followed by laying the flooring.
8. Connecting and Installing Equipment. Once all surfaces are fully prepared, install sockets and switches, plumbing fixtures, and the necessary equipment. It’s important to check all joints and connections when connecting appliances and installing bathtubs and shower stalls to ensure there are no leaks.
9. Final Stage. The room is ready; all that remains is to arrange the furniture and add accessories: mirrors, decorations, and hangers.
Of course, it’s impossible to reduce everything to a single order and sequence. Much depends on the project and the technologies used. The most important thing is to carefully consider the final design and carefully select the materials. This will save time and money and avoid common mistakes.
Conclusion
Lack of clear renovation planning is the most common mistake. No one requires the client to prepare a comprehensive estimate, but they should at least determine a rough list of work and materials, as well as the cost of contractors. If the budget is limited, don’t try to do everything at once. It’s better to focus on specific, urgent tasks.
Also, don’t try to do everything yourself if you have no experience. Such cost-cutting will backfire. It’s best to contact reputable specialists, so the renovation will be completed quickly and efficiently.