Roger Morph

Animal references can be converted to meshes for rigging, animation, refinement and export using image-based 3D workflows. Automated bone placement understands the body, limbs, and joints that are visible and creates an initial skeleton structure. During generation, species anatomy, perspective, image clarity and mesh quality have a strong impact on skeletal interpretation. A prepared reference will help with geometry clarity and predictable deformation when performing later animation tasks.
Why Animal Rigging Requires Anatomical Awareness
Animal rigging requires an understanding of anatomy, as each species has different skeletal relationships and joint constructions. Quadrupeds move with four legs, and birds move with two legs and wings and particular anatomical structures. Reptiles may have long bodies, low profiles, or unique limb positions that make interpretation of the skeleton difficult. Stylized creatures can have disproportionate parts, which can lead an AI 3d model generator to interpret the anatomy differently from actuality. They should be inspected because they are detecting something unusual in the anatomy; automated systems make assumptions about structure based on the visual evidence and not biological rules.
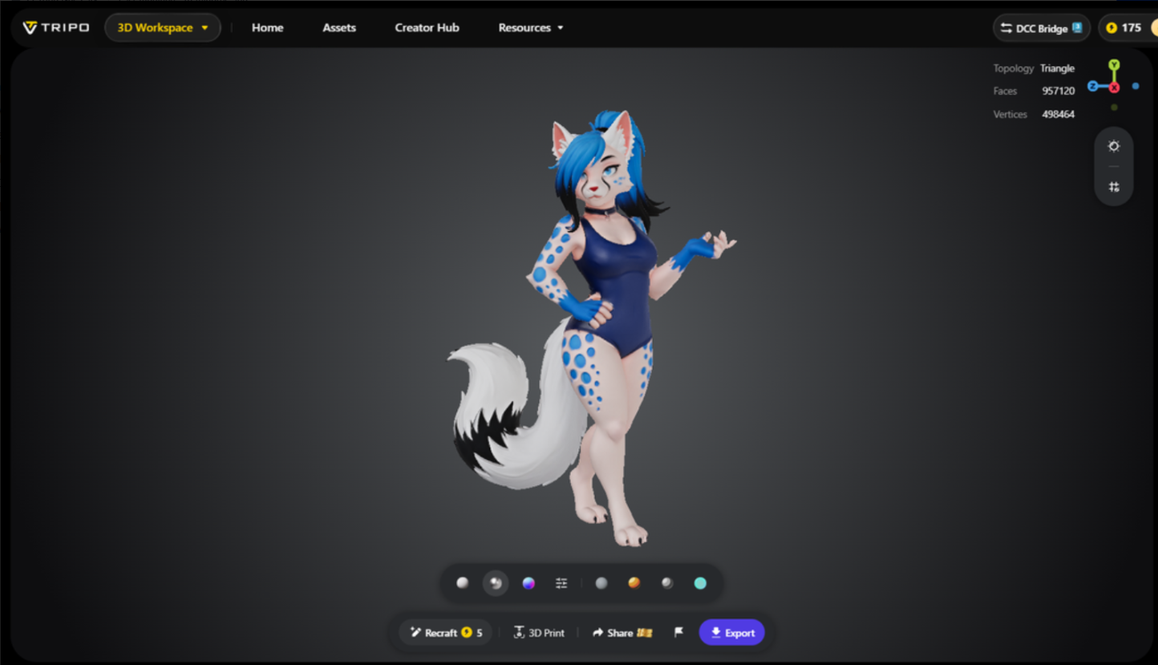
Preparing Animal Images For Better Rig Interpretation
Clear reference images help explain the limbs and body silhouettes to image to 3d model workflow. Look for pictures in which shoulders, hips, knees, feet, neck and tail are all visible throughout the picture. Joints may be concealed by occlusion, and body proportions and apparent limb lengths may change with extreme perspective. When visual clues such as angles are available, multi-view referencing may be used as additional evidence. If an animal is viewed consistently, it should be the same animal, and the proportions should be similar with no conflicting poses or scales.
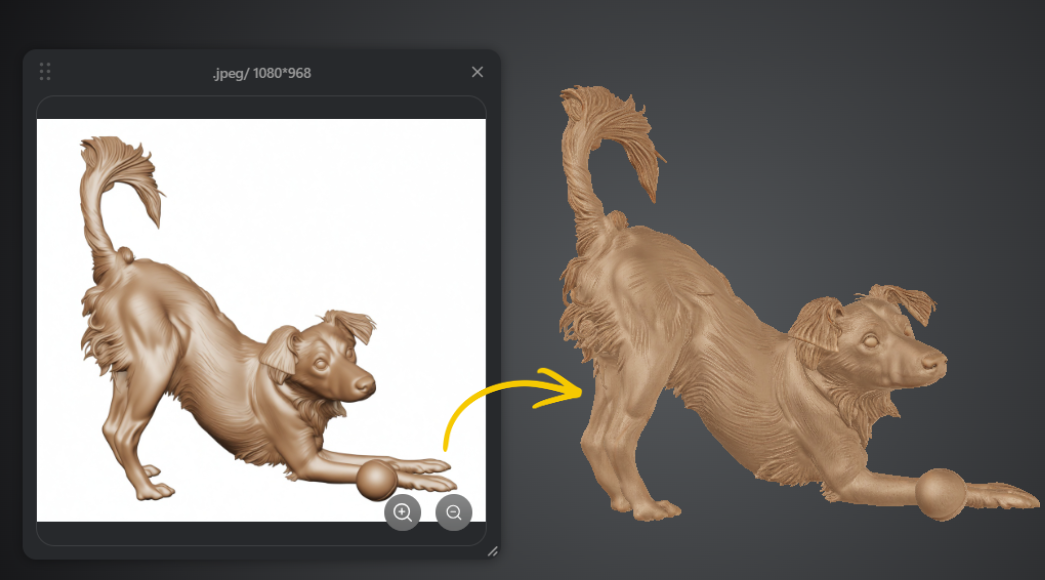
Steps to Generate Animal Rigs Using Image to 3D Model Automated Bone Placement
Step 1: Prepare the Animal Image and Model Workspace
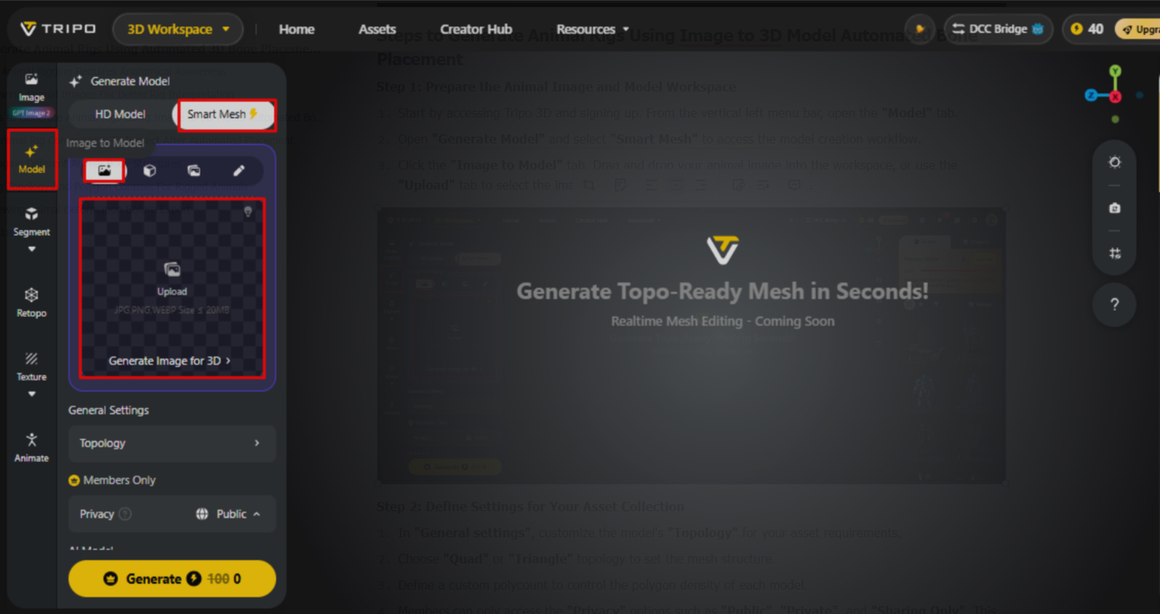
- Start by accessing Tripo 3D and signing up. From the vertical left menu bar, open the “Model” tab.
- Open “Generate Model” and select “Smart Mesh” to access the model creation workflow.
- Click the “Image to Model” tab. Drag and drop your animal image into the workspace, or use the “Upload” tab to select the image from a specific location on your device.
Step 2: Define Settings for Your Asset Collection
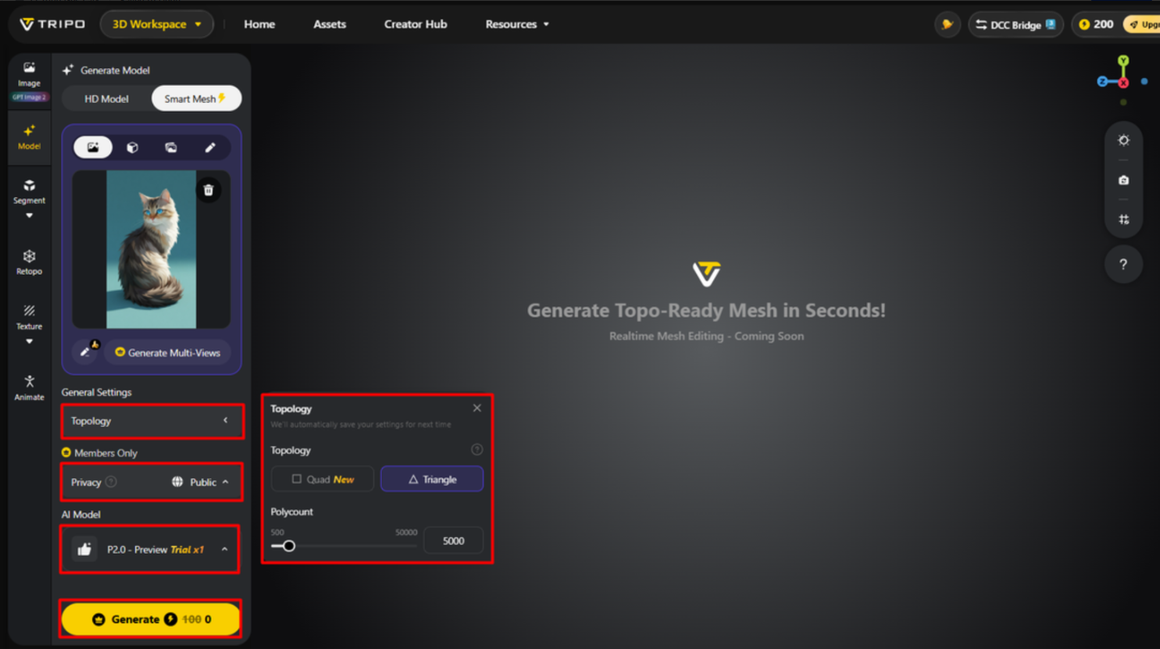
- In “General settings”, customize the model’s “Topology” for your asset requirements.
- Choose “Quad” or “Triangle” topology to set the mesh structure.
- Define a custom polycount to control the polygon density of each model.
- Members can only access the “Privacy” options such as “Public”, “Private”, and “Sharing Only”. This way you can keep your content private, share it with any specific person you want or keep it public.
- Choose a model from the available list. Tripo currently supports “P1.0” and “P2.0” which differ in quality, stability, and speed. Please note P2.0 may result in longer wait times and you can use it on a trial basis (“Trial x1” per session), while P1.0 is billed separately using points.
- Click “Generate Model” to create the asset for your collection.
Step 3: Check the Rigged Animal and Save the Result
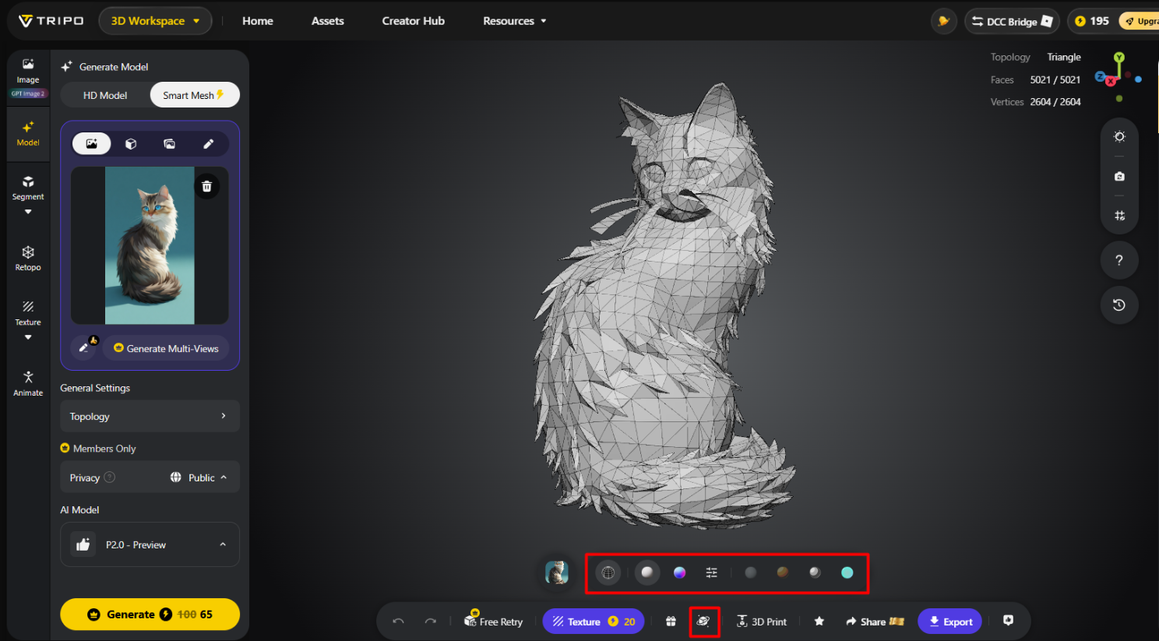
- Your generated model can be viewed in multiple display modes. These include Wireframe Mode, White Model View, Texture View, Shader, and HDRI. For additional design improvements, click “Refine” in the bottom menu.
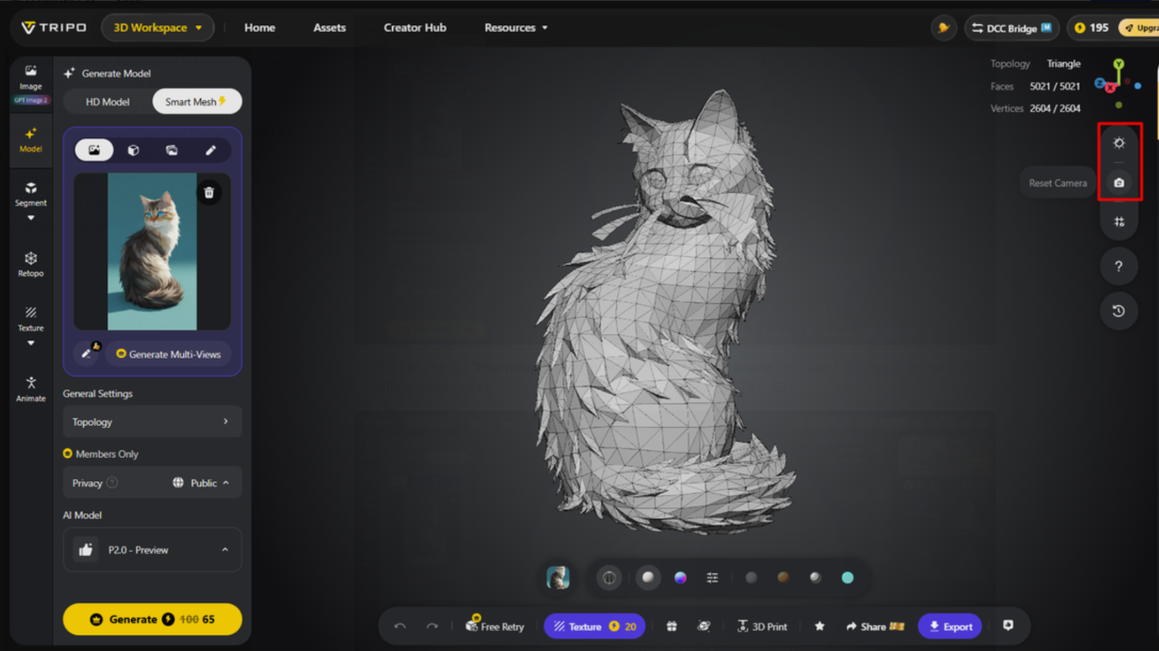
- You can change “Environment Settings” and use “Reset Camera” to inspect the rigged animal from different viewpoints.
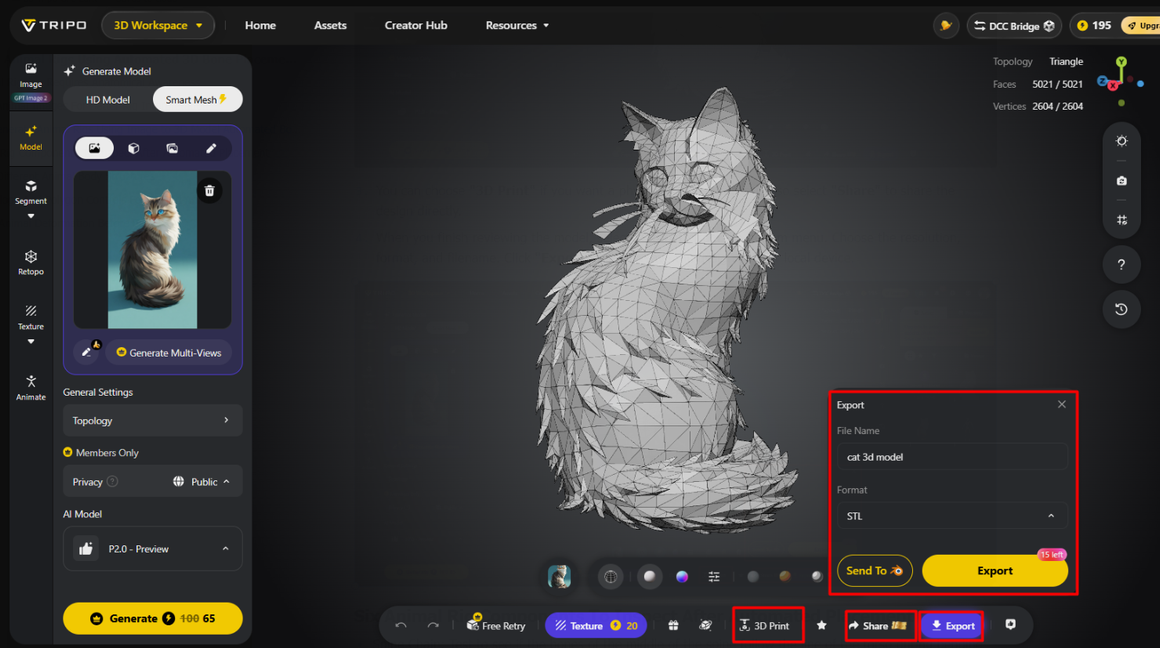
- You can choose “3D Print” if you want a physical version. You can also select “Share” to share the design directly.
- When you finish reviewing the model, select “Export” from the bottom menu. Choose the resolution, format, and filename. Click “Export” again to save the design to your local device.
Six Animal Rig Components To Inspect After Automated Placement
- Spine Chain: Test to see if the bones of the middle of the spine follow the line of the torso during bending and twisting. If it’s not positioned properly, it can cause unnatural deformation during animation through the abdomen, chest and back.
- Leg Joints: Check against anatomical landmarks before testing movement (shoulders, elbows, hips and knees). Small joint errors are easily discernible on the quadrupeds in walking, running and crouching postures.
- Neck Structure: Check if neck bones and head/torso relationships are correct. If the neck is long, it may be necessary to check placement, as a small change in placement can significantly change the head movement.
- Tail Bones: Investigate whether there is a functional series of bones in the tail. The tail motion relies on the distribution of the bones, topology and how the mesh bends during animation.
- Head and Jaw: Review facial or jaw structure if the rig created contains these articulations. Skulls vary greatly in size, jaw position and head mobility, particularly in stylized representations.
- Foot Structure: Check paws, claws, hooves, or feet for correct positioning of skeletons during testing. Ground contact is hard to determine if toes, ankles, or other small extremities are partially hidden in source images.
Managing Different Animal Body Structures
Automated rigging currently only reliably supports T-pose humanoid characters and standard standing quadrupeds. Non-standard poses, non-humanoid creatures, or abstract shapes may not rig correctly, so results should always be visually inspected before use.
Even within supported categories, requirements vary: quadrupeds require coordinated limb chains, and joint placement must match the model’s proportions, since animals with unusually large heads, legs, or altered joint structures may need manual correction. The text to 3d model workflow can also generate anatomically inconsistent geometry, which must be carefully checked against the skeletal system before rigging.
Birds, reptiles, stylized animals, sitting or non-standing poses, and anthropomorphic bipedal characters fall outside current official support and carry a higher risk of rigging failure. There is no universal rig structure that works across all animal shapes, and manual visual verification is always required.
Using Topology And Polygon Controls For Rigged Animals
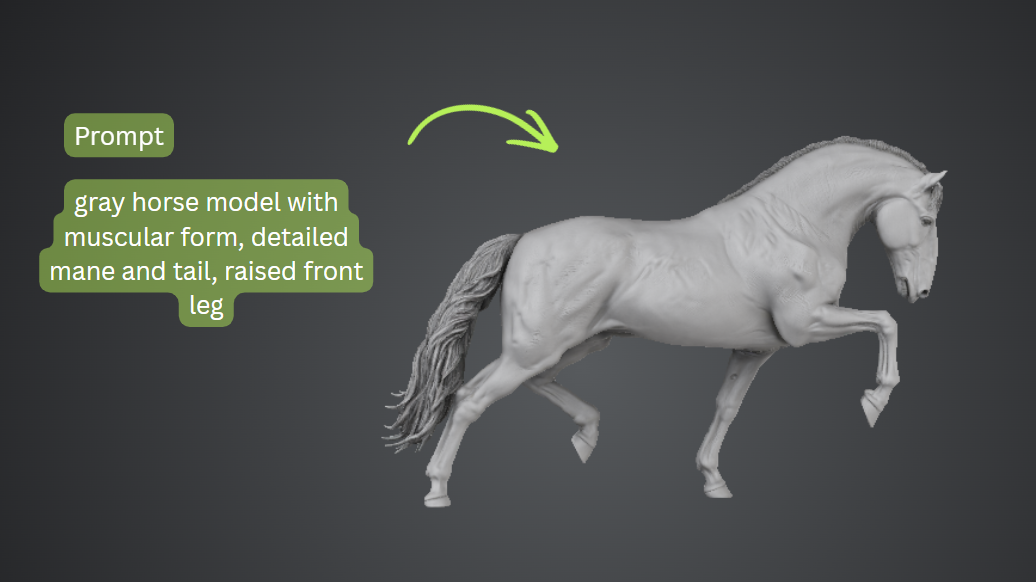
Topology and polygon density shape how different animal workflows perform, affecting deformation, editing, shading, and runtime performance alike. High-density geometry preserves complex shapes but can be harder to edit and process during animation. Quad-based topology, by contrast, supports clean mesh editing and deformation, since edge flow can follow the underlying anatomy. Interactive assets, on the other hand, can rely on low-poly geometry, which requires simpler meshes and less computational power. The polygon controls let you tailor mesh density to the asset’s intended use, instead of treating every animal asset the same way. Well-structured geometry also makes later stages of corrective editing and weighting easier to manage.
Reviewing Animal Deformation Before Export
Deformation checks can detect issues that can be missed when examining an animal in its neutral stance. Try out the shoulders, hips, knees, necks and tails across multiple poses prior to export of the editable asset. Look for stretched-out surfaces, collapsing surfaces or loss of articulation between bone and surrounding mesh. Neck testing can help to determine if there is unnatural compression or surface stretching of the neck during head movement. Tail poses can reveal unequal bone spacing or lack of articulation over curvy tail regions. Iteratively improve the model as necessary, adding or removing geometry and/or skeletal relationships, and repeat deformation checks.
Conclusion
The creation of editable animal models from photographs involves a combination of work on references, anatomy, geometry, bones, topology, and deformation. Good source images provide more obvious clues to the automated systems in order to interpret the joints, proportions, and body structures. Even the generated meshes should be checked, as the position of the skeleton could differ depending on the image quality and settings. By looking at a few poses, deformation issues can be seen before an asset is sent to an animation-focused app. Tripo 3D can help with this process by linking model generation, refinement, rig and export in a single workflow.